As you get started with model railroading you are going to want to create your own virtual world, which means you are going to want to build benchwork and scenery and settings for your trains. I mean, how long can you watch your train go around in circles on the floor?
Building Benchwork and Layout
This article is in two parts – the first part is not so much about scenery, as about what supports it. The more pre-planning you do, the easier it is in the long run to concentrate on what’s really important – the operating of your railroad. Whether you want to create a miniature version of some time or place, or just operate your trains in a wonderful dream world, you want your railroad to be placed solidly.
Whether you are ready to build something permanent, or perhaps portable or modular (to display at shows and conventions), the foundation of your layout will be the benchwork. Benchwork is the platform upon which you will build every other aspect of your railroad layout. You can either build your own, or purchase a kit (or kits). Kits are ready to assemble, and you can of course take them apart if necessary, to store when you need the space, or travel with to shows.
Building your own benchwork requires some skills with wood, and tools, such as saws, screwguns, measuring, etc. Don’t worry, there is nothing difficult about this. The advantage to building your own is that you can design the exact benchwork to fit your desired layout. Oh – the layout! You do have some ideas for a layout design, right? If you do, great! If not – that’s alright, the beauty of model railroading is that you can expand on your layout as you want to, as you get ideas. Some old-timers have developed their layout over 15 or 20 years! Part of the fun is adding in new dimensions as you make new discoveries in life.
 Some model railroaders have built a layout on shelving along two walls! With a 2 by 8 foot “shelf” you can build a module that can be mated with other modules to construct a full railway. Of course this only allows for back and forth switching (no loop). For some people, that’s enough!
If you need some plans, visit here to see what’s available.
The British have perfected the art of layout designs on shelves. There are many British layouts only 8 to 12 feet long made from smaller 2 to 4 foot sections.
You can build a diorama, which may depict a small scene of an industry. Let your imagination roam!
Some things to consider when designing benchwork (and your layout):
• How large do you want to get, and how much room do you have? Some modelers have built n-scale layouts in a shoebox!
• How much room do you want around your railroad for scenery?
• What shape will your layout be? Square, rectangle, oval, irregular?
• Will you be expanding your layout in the future?
• Do you want all or part of your layout to be portable or modular?
Will you be building your layout in a permanent location, or is there any chance it will have to be moved? If you will have to move it, then I recommend you build your benchwork in modules about 3×6 feet – no larger than one or two people can carry! Build 6 of these and you can put them together to have a 6×18-foot table!
Benchwork Particulars
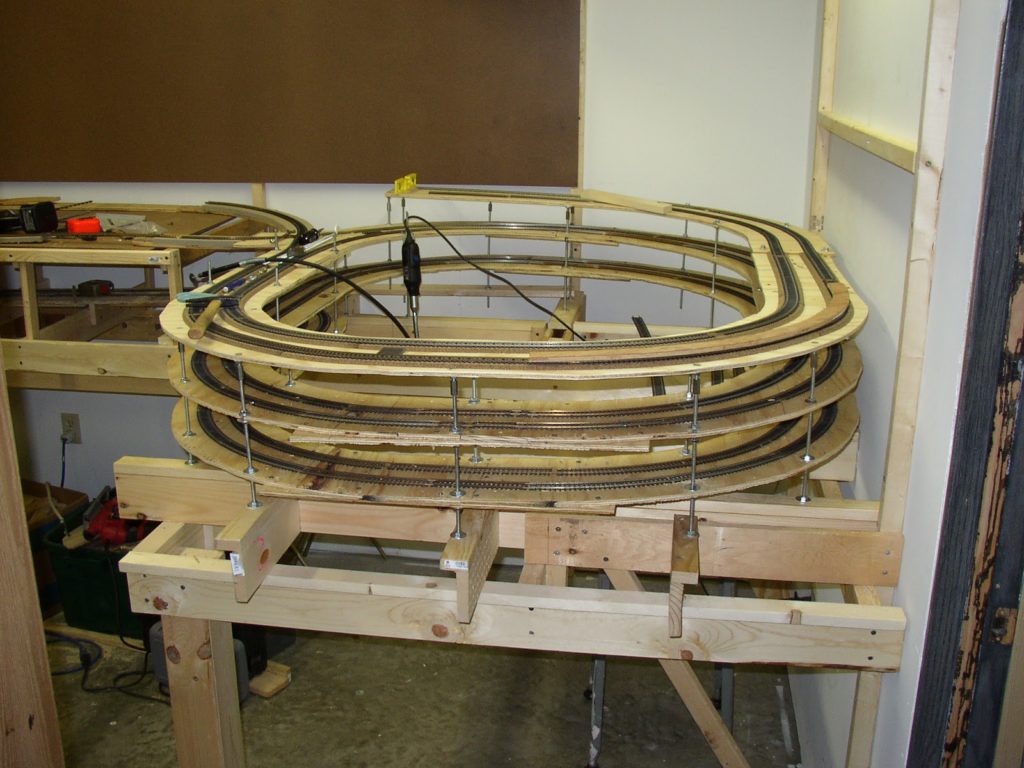
The most important part of your benchwork is that is a solid surface, resting solidly on the floor (assuming you are not building a shelf railway). Typical bench height is 28-30 inches.
The best design for benchwork seems to be a framework built from 1×2 boards for smaller layouts, with 1×4 boards for a layout larger than 2×6 feet. Place the boards on edge to create the frame, and then add more boards inside to create a grid (when looking down at it) which has boxes no smaller than 2×2 feet. This gives the best support to your tabletop.
Always construct your benchwork using screws, so that you can dis-assemble or remove them without disturbing the rest of your setup. Use a pilot drill for drilling holes, so you don’t split the wood.
I don’t recommend particle board or MDF board, which can sag and are pretty heavy. ½ plywood usually works well.
A good surface will be at least 3/8” or ½” plywood. Although some modelers like to elevate the plywood above the grid a few inches, and then cut away the plywood anywhere there is not going to be track or scenery, I prefer to use 2-inch extruded polystyrene insulation board, which can be gotten at any home improvement store.
Why elevate the plywood, or use 2-inch insulation? This allows for bridges, fills, water features, and natural variations in your scenery later on!
If you are going to have a layout with lots of variation in elevation, then you can build up from the open grid with multiple layers of insulation (which is very easy to carve away to create realistic terrain!) Make sure you use the proper adhesive, I like Liquid Nails “Projects and Foamboard” cement, to glue foamboard (to foamboard or plywood).
Note – do not use the white “expanded polystyrene” or “beadboard” because these types have virtually no strength.
Once you have built your benchwork, you are ready to add some scenery.
In Part 2, I’ll talk about scenery. See you there!
Building Model Railroads takes more than just railroad know-how. Learn some nifty techniques for building your benches and supports. Check Out Teds Woodworking Plans Here

Pingback: About Model Trains and Railroading
Pingback: HO Model Train Layout Guidelines
Pingback: Building Model Railroad Benchwork | Wood Carving Kits